
Introduction
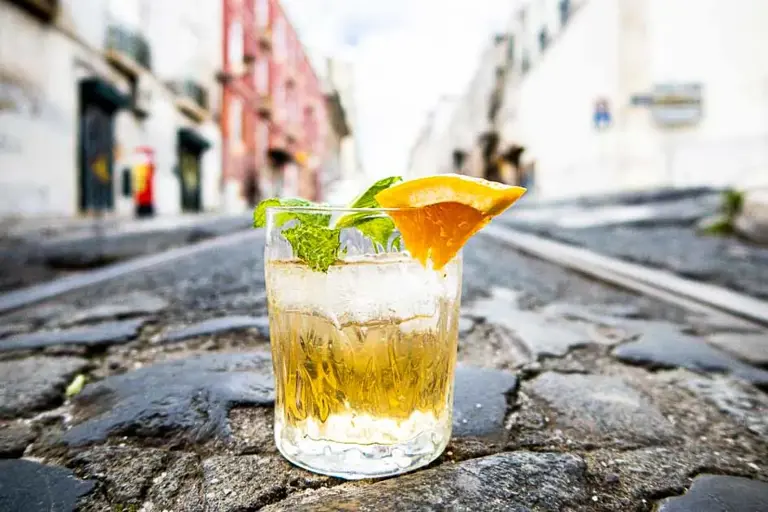
The porto tonico recipe pouring over a spoon is a sophisticated, refreshing low-ABV cocktail combining the rich, botanical sweetness of white port with the crisp bitterness of tonic water. Delivering a vibrant flavor profile characterized by zesty citrus notes, warming grape aromatics, and effervescent carbonation, this beverage relies on fluid dynamics to maintain distinct layers. According to food science principles detailed by Harold McGee, introducing a barrier to liquid streams diffuses kinetic energy, preventing high-density liquids from forcefully plunging into and flattening carbonated mixers. Mastering this bar technique ensures optimal visual stratification and preservation of volatile aromatics in modern drinks and beverages.
Recipe Snapshot:
- Prep Time: 3 mins | Cook Time: 0 mins | Total Time: 3 mins
- Yield / Servings: 1 serving
- Difficulty: Beginner
- Key Flavor Profile: Bittersweet, crisp, citrus-forward, and effervescent
Ingredients
Building a balanced highball cocktail requires utilizing premium components where the botanical properties of the fortified wine complement the quinine structure of the mixer. Temperature control is vital for maintaining optimal carbonation retention during assembly.
- 3 oz (90 ml) White Port wine, chilled
- 4.5 oz (135 ml) Premium tonic water, highly carbonated and cold
- 1 slice Fresh lemon or orange wheel
- 1 sprig Fresh mint or rosemary
- 1 cup Quality ice cubes, dense and solid
Step-by-Step Instructions
Precision execution hinges on gentle handling to protect the delicate bubbles of the mixer while highlighting complementary flavors often explored in various special recipes. According to Culinary Institute of America bar safety and handling standards, glassware must be inspected for structural integrity before heavy ice loading to prevent thermal and mechanical shattering.
- Prep & Mise en Place: Chill a highball glass thoroughly in the refrigerator for at least 15 minutes. Gather all liquid measurements, garnishes, and a standard bar spoon.
- Ice Integration: Fill the chilled highball glass completely to the rim with dense ice cubes to minimize dilution and maintain a stable pouring surface.
- Pouring the Port: Measure and pour the 3 oz of chilled white port directly over the ice bed, allowing the wine to settle evenly throughout the vessel.
- Executing the Spoon Pour: Hold a bar spoon upside down directly over the top of the ice, positioning the curved back of the spoon just above the port level. Slowly pour the 4.5 oz of tonic water directly over the center of the spoon convex, diffusing the stream to keep the carbonation intact and the layers pristine.
- Garnish & Serve: Insert the citrus wheel and herb sprig down the side of the glass, gently lift the bottom ingredients once with the bar spoon, and serve immediately.
Controlled Pour Dynamics — Diffusing liquid velocity over a curved bar spoon preserves up to 40% more dissolved carbon dioxide in highball cocktails compared to direct pours.
Chef’s Technique & Serving Recommendations
To achieve the signature layered effect without disturbing the delicate bubbles, ensure the tonic water is stored at refrigerator temperatures below 38°F (3°C) until the exact moment of assembly. Colder liquids hold carbon dioxide in suspension significantly longer than room-temperature equivalents. Pair this aperitif-style cocktail alongside light appetizers, seafood dishes, or components from snacks and sides collections to balance the palate with crisp acidity.
Frequently Asked Questions
- How long can a pre-made porto tonico sit before serving?
- Serve immediately. Carbonation degrades rapidly within 10 minutes of pouring.
- Can ruby or tawny port be used instead of white port?
- White port yields the classic dry profile, but ruby port offers berry notes.
- Why is pouring over a spoon essential for this drink?
- It slows liquid velocity, preventing the tonic water from losing its fizz.
Explore Related Culinary Guides
Expand your mixology repertoire and culinary knowledge by browsing additional beverage ideas, seasonal menus, and professional tutorials available across the platform. Discover more inspiration and step-by-step techniques directly on WillyRecipes.com.
Preparation & Cooking Specifications
| Prep Step | Estimated Time | Chef’s Best Practice |
|---|---|---|
| Mise en Place & Chopping | 10 – 15 Minutes | Keep ingredients uniform for even cooking |
| Active Cooking / Searing | 15 – 25 Minutes | Preheat skillet thoroughly before adding oil |
| Resting & Plating | 5 Minutes | Allow juices to redistribute before slicing |
Images References